I tried my hand at making my own granola. This has many benefits: (1) It's cheap, oats don't cost much. (2) I can included all of my favorite things (like dried apricots) and leave out those that ruin my store bought granola bars (like pecans). I, sort of, followed the directions laid out here.
The starting line up:

You've got oats for the basic substance, wheat germ to add fiber and protein, peanuts & sunflower seeds for protein and flavor, apricots & raisins for sweetness and vitamins, and honey to glue it all together. Not pictured: vanilla, brown sugar, and butter.

The first step is to mix your oats, nuts, and seeds together, then toast them. I used two cups of oats and 1/2 to 1 cup of the other ingredients, depending on how much I had and how much I liked the flavor. I crushed the peanuts by putting them in a plastic bag and rolling a ceramic bowl over them for awhile. I didn't want whole peanut chunks, but that's a personal preference. I also added 1/2 cup of fiber cereal because I had it. Stir this all together and spread it out on a cookie sheet (or the largest pan you have) with sides. Place it in a 400ºF oven, stirring frequently. Make sure you watch it so it doesn't burn. When it looks nicely browned, turn you oven off and combine the toasted mixture with your dried fruit.
The next step is to cook up your glue. I found that 1/2 cup of Honey, 1/2 cup brown sugar, and 4 T of butter was about right. You can also throw some vanilla in if it sounds tasty to you. Cook this on medium
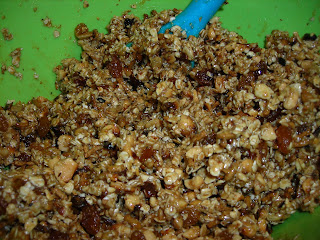
to medium low in a saucepan, stirring constantly. You want the mixture to boil. The longer it boils, the harder the resulting sugar substance will be. Perhaps I will do a future post on the Chemistry/Physics of candy making, but what you need to know now is that it really only needs to boil, and then you can remove it from the heat. Pour this mixture 1/3 at a time over your other combined ingredients, stirring in between pours. You want to make sure you coat everything, or your bars will fall apart.
Transfer your mixture to a casserole dish lined with plastic wrap or waxed paper that overhangs the sides of the dish. You need to compress the bars now, before they cool. Make sure the top is covered with waxed paper or plastic wrap as well, and press down hard, either with you hands, or some other implement. I found that bread pans worked well, but you can do this however you like.

When the granola is cool, pull it out of the pan and cut it into bar sized pieces. You can wrap these individually in plastic wrap or plastic baggies, or you can store them together separated by waxed paper in a container.
Things that I did wrong while making these bars:
(1) I burned my oat mixture, oops.
(2) I overcooked my sugar glue, and my bars could break a tooth.
However, I look forward to trying this again. I'm excited about all the possible variations. I could incorporate dried banana, or butterscotch chips. I could add cinnamon and nutmeg with dried apple pieces. I could substitute maple syrup, molasses, or sorghum for the honey. The possibilities are bountiful. I could go tropical with coconut and pineapple. I am excited for granola bar flavor options that go beyond chocolate chip and oats & honey. Let me know if you try this recipe out, and if you find some magical ingredient combination. Happy eating!

No comments:
Post a Comment